
How Do I Share a Link to a Report?
Another entry in our 'Basics' series, this article will cover how to setup a Shared Link for a report in Report Toaster.
Video more your thing? Check out the video version of this guide here.
Note - You must be on a paid plan of Report Toaster to have access to this feature. You can check out our app listing for more information on our various plans.
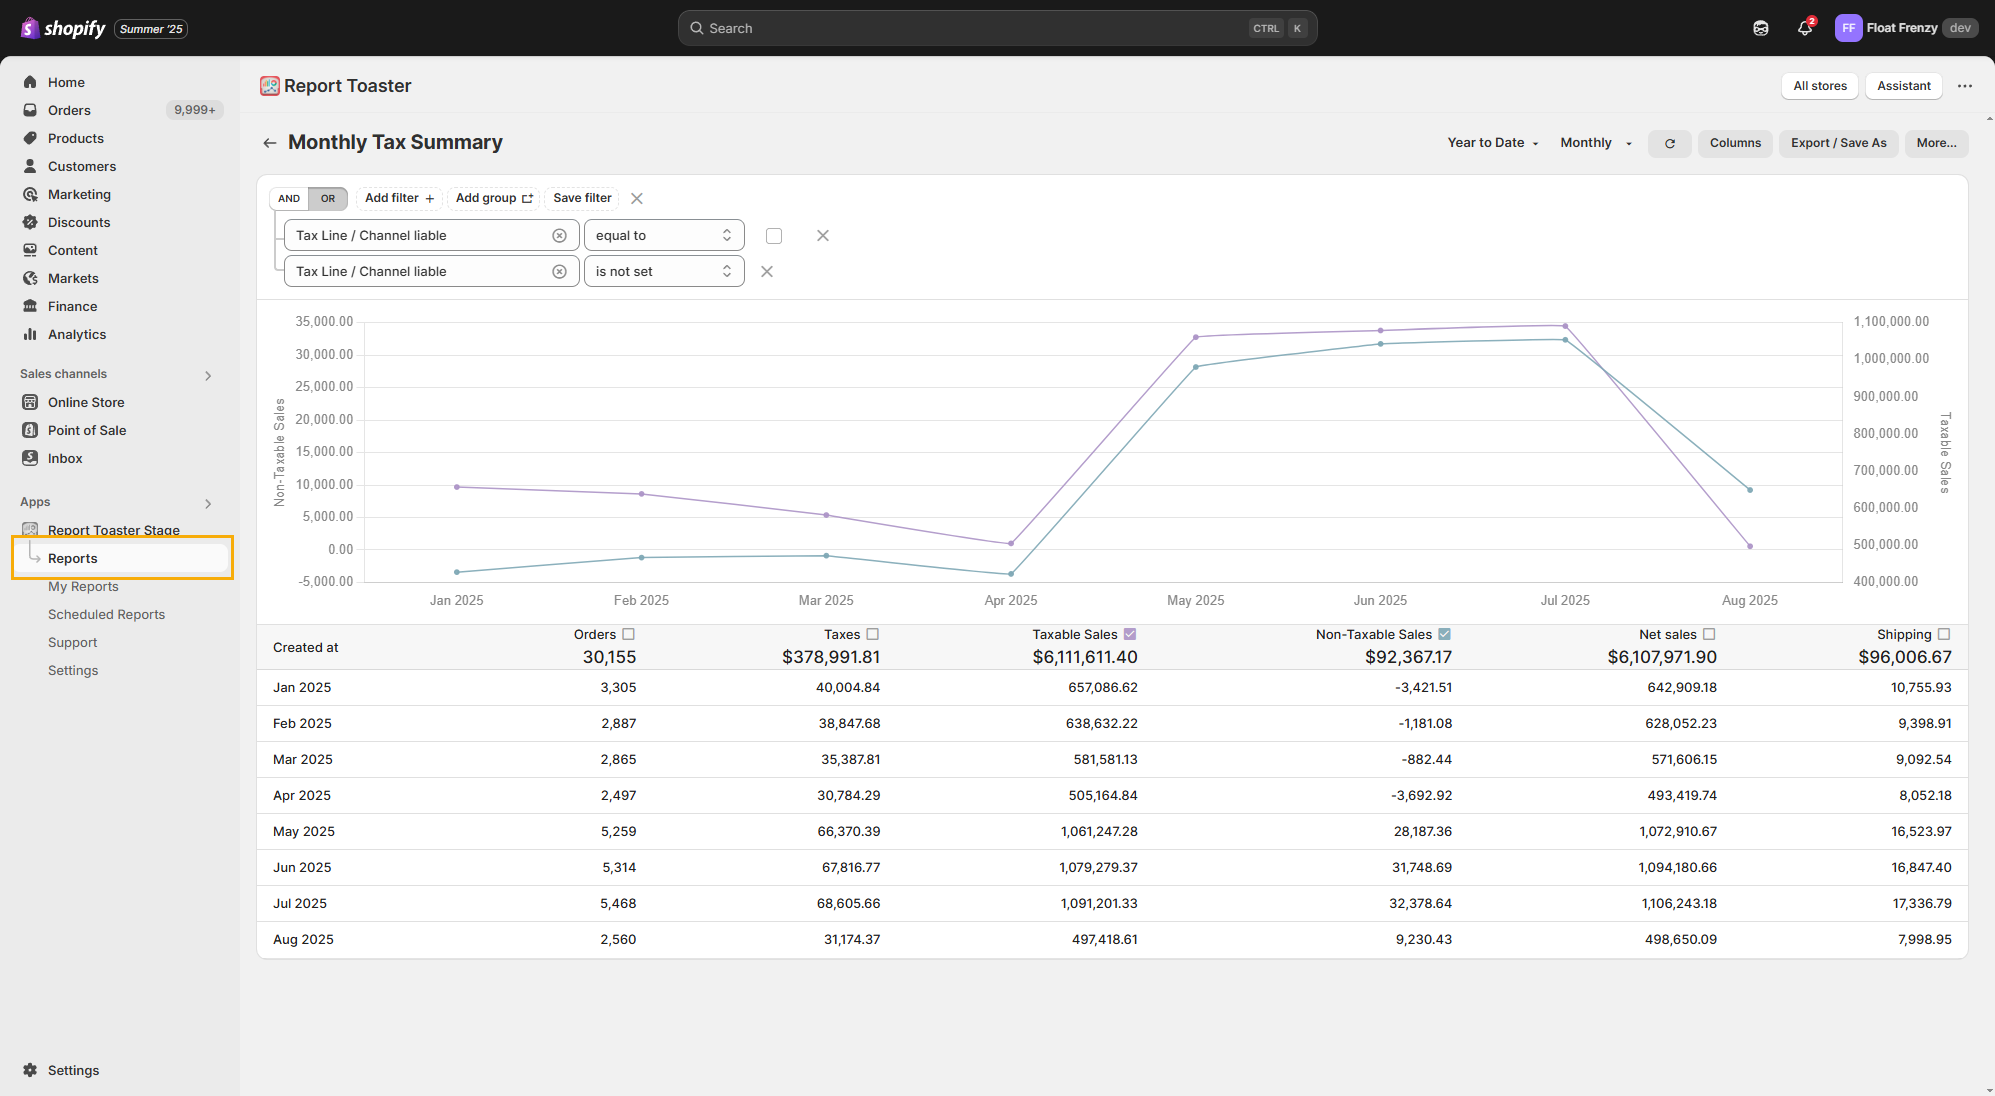
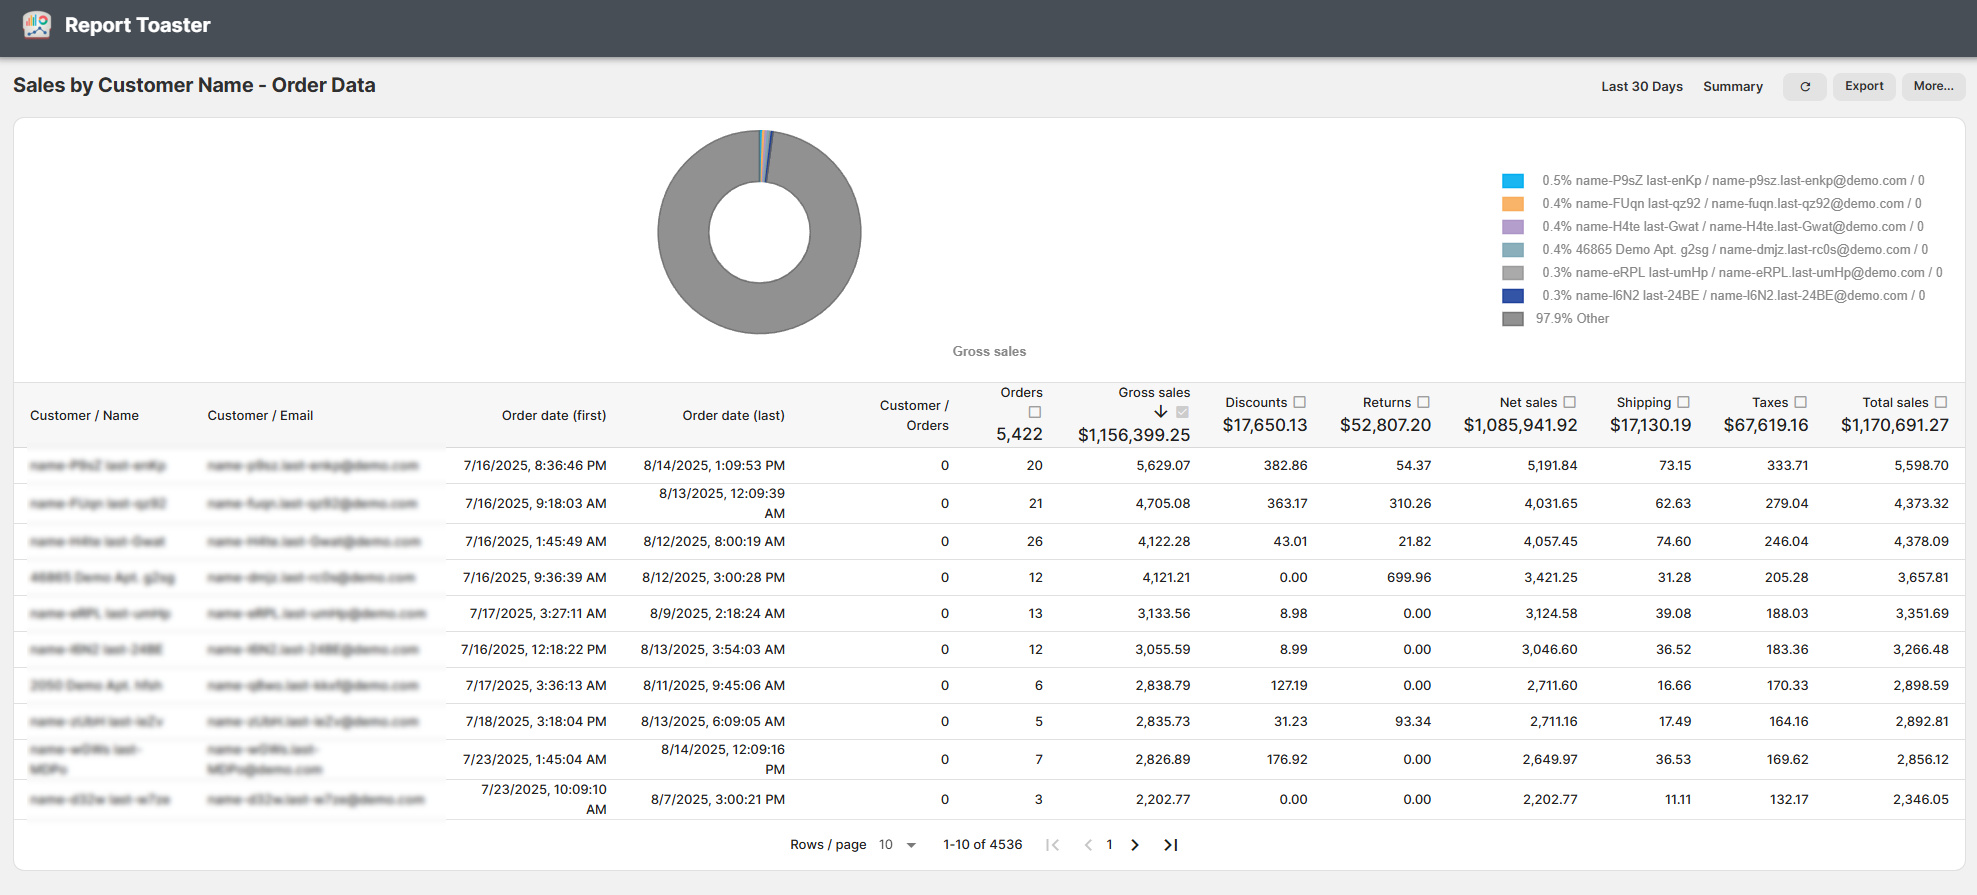
For instance, suppose I wanted to create a Shared Link to a Taxes report to send a copy of the data to my accountant.
We'll start with the Monthly Tax Summary report from the built-in reports section.
(click image to enlarge)
Creating a Shared Link
Once I've found the report I'm looking for, it's time to create the hyperlink.
Start off by clicking the Share button next to a report.
(click image to enlarge)
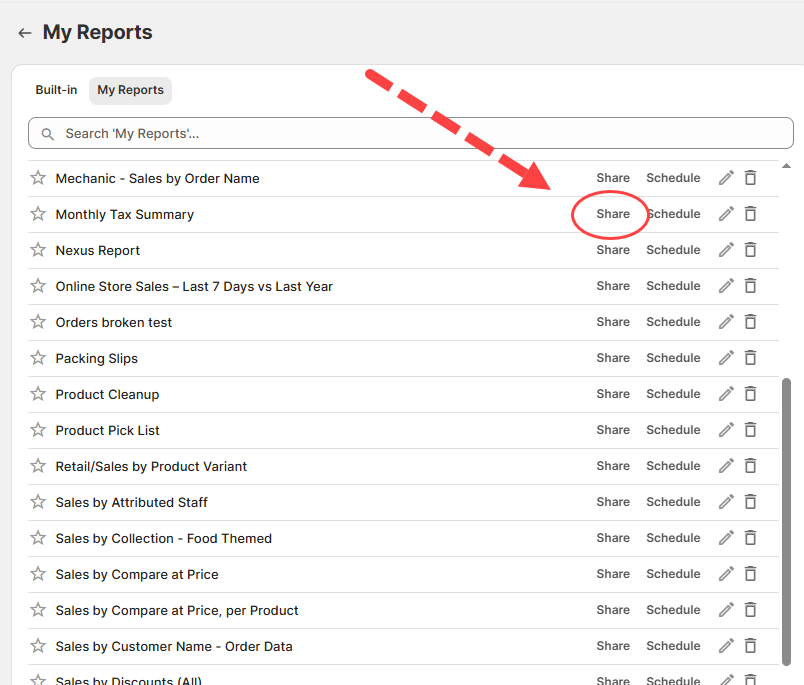
This option exists for both built-in reports (under the Reports menu) and those you've saved to My Reports.
Generally speaking, we would advise saving reports to My Reports first before sharing a link to them.
This ensures that any future changes you make to the report will be carried over to version you have shared.
Otherwise, sharing a link to the built-in report is strictly limited to the defaults for that report.
For multistore users, bear in mind that the Shared Link will utilize data from all of your stores for this report. If you want to limit the shared link to only show data from one (or more) stores, then utilize a filter for Shop Name accordingly.
Read-only links
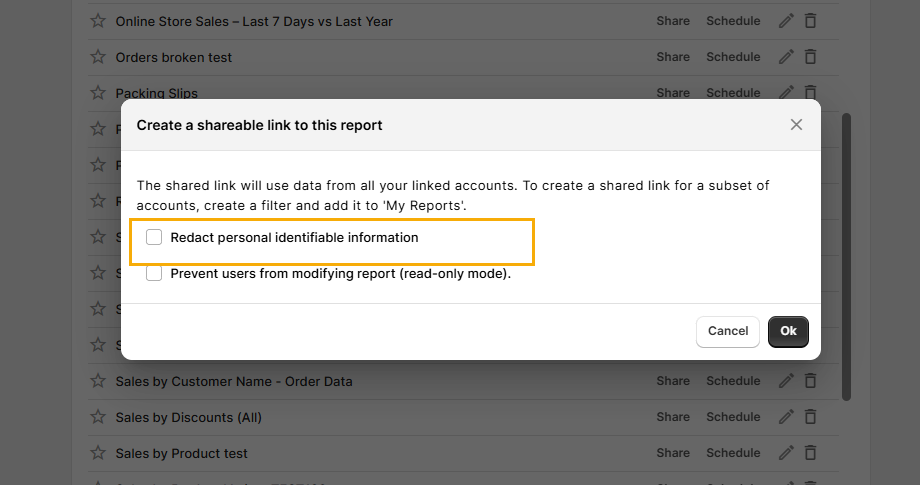
If you haven't created a Shared Link to this report before, it pops up with the following dialog box with a couple of options:
(If you've already created a Shared Link before, it skips this step)
(click image to enlarge)
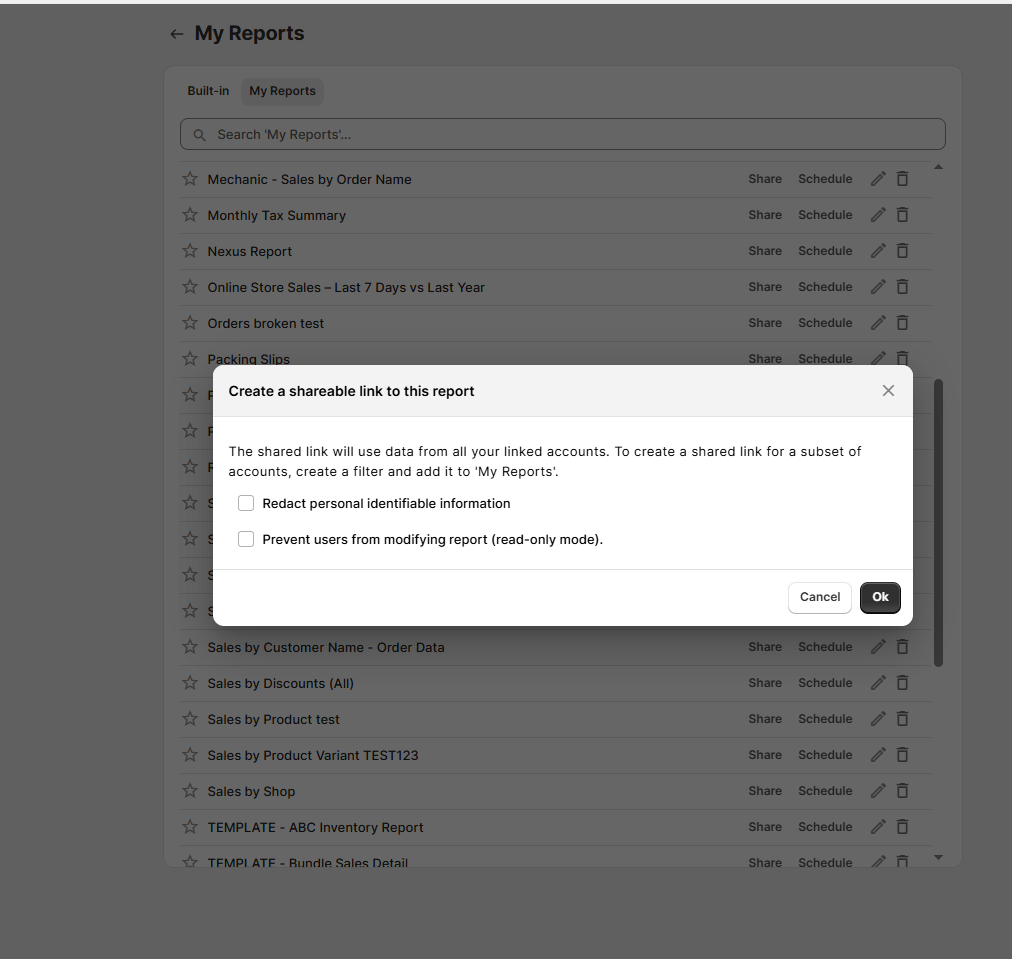
First, you have the option to prevent users from modifying the report (read-only mode). When you choose this option, anybody with the link will not be able to make changes to the report.
(click image to enlarge)
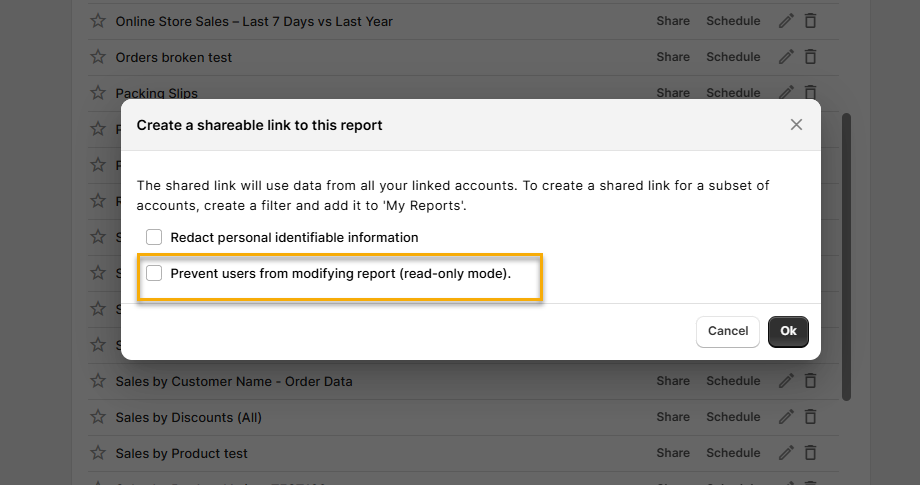
This includes changing columns, filters, or the date range (the date range appears but cannot be clicked on to change it).
(click image to enlarge)
Note - Changing the columns, filters etc does not change the report you have saved in your My Reports (all changes are temporary). To modify the report you have saved, navigate to the report in My Reports, make the changes, and save again.
Redact Personal Info
The other option you have when creating a shared link is to redact personal identifiable information. Toggle this option to redact Personally Identifiable Information (PII) on the report.
(click image to enlarge)
Note, you can only toggle PII redaction when first setting up the link. If you want to add/remove PII later, revoke the link and create a new one.
Remember to give any recipients of your link the new one when you're done!
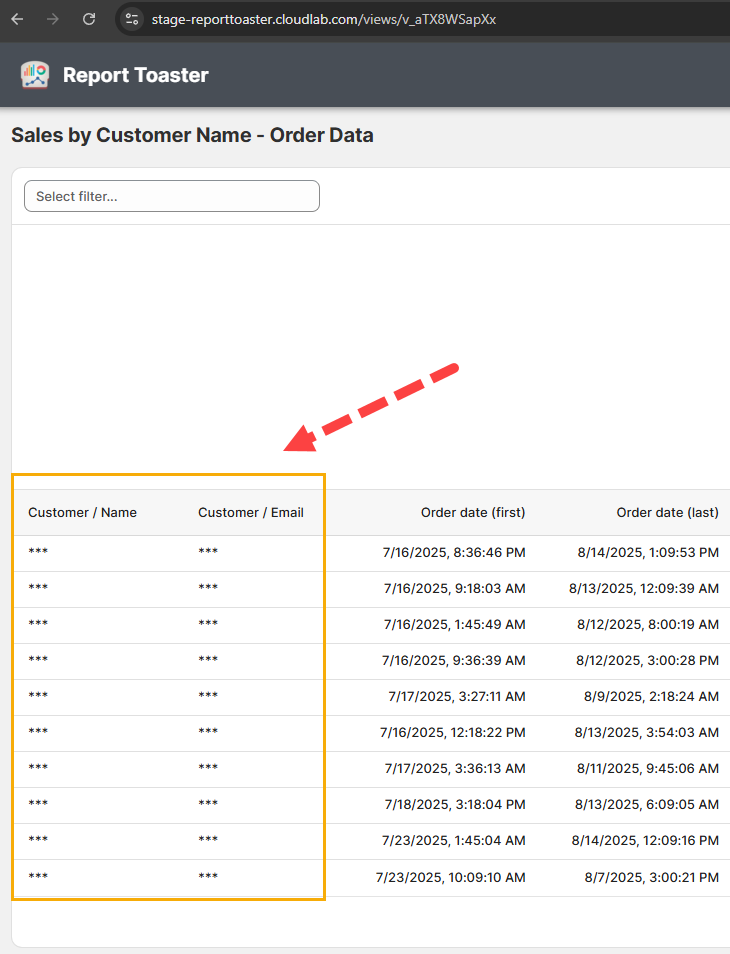
This replaces fields like customer name, email, phone with asterisks (***).
Doing so is especially relevant to European customers who have GDPR requirements and for those links you plan on sharing externally from your organization.
This is what the end result looks like for anybody with the link:
(click image to enlarge)
Using Shared Links
Once your link has been created, you will see the following dialog box:
(click image to enlarge)
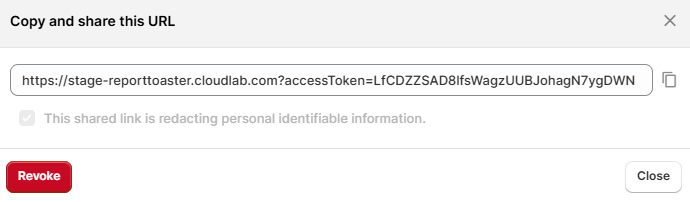
From here, copy the link and paste it anywhere like a normal hyperlink. The recipient sees the report with the same data, can export it, adjust columns/filters/date range, but cannot access your other reports or account settings.
Revoke a Link
Sometimes you don’t want the link to your report to be permanent. Click Revoke to expire any existing Shared Links. A confirmation will appear:
(click image to enlarge)
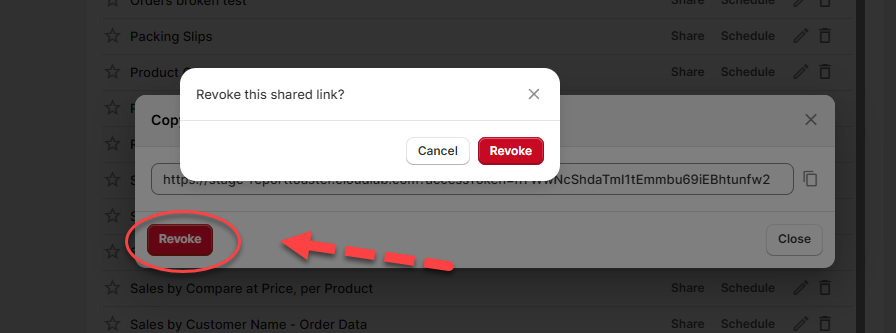
Any prior recipients will no longer have access. Create a new link if needed.
For other articles in our Basic Guides series, check out our main section here.